English
 Türkçe

Before connecting an IE3-efficient three-phase motor to the panel, the single most critical question is this: should the windings be wired in star (Y) or delta (Δ)? This decision is not arbitrary; it is determined by the voltage pair printed on the motor nameplate and the supply (line) voltage at your facility. An incorrect bridging either overheats the motor by running it at too low a voltage, or burns the winding within minutes at excessive voltage. In this article we cover, step by step, the 230/400V (Δ/Y) and 400/690V voltage pairs on an IE3 nameplate, the bridging logic in the terminal box, why a 400/690V motor is chosen for star-delta starting, and the most common field connection mistakes.
What Does the Voltage Pair on the Nameplate Mean?
Every three-phase asynchronous motor nameplate carries two voltage values with two corresponding connection symbols. The two most common pairs are:
- 230/400V (Δ/Y): When the motor is wired in delta, each winding sees 230V; when wired in star, the line voltage is 400V. The voltage across each winding is 230V in both cases.
- 400/690V (Δ/Y): When the motor is wired in delta, each winding sees 400V; when wired in star, the line voltage is 690V. The voltage across each winding is 400V in both cases.
The core principle is this: a motor winding is designed for one voltage only. In a 230/400V motor the winding is wound for 230V; in a 400/690V motor the winding is wound for 400V. The lower value on the nameplate always belongs to the delta (Δ) connection, and the higher value to the star (Y) connection. This is because in a star connection the line voltage is √3 (approximately 1.732) times the winding voltage.
The √3 Relationship: Voltage Distribution in Star and Delta
In a delta connection each winding is connected directly between two phases, so the winding voltage equals the line voltage. In a star connection, one end of each winding meets at a common neutral point; the voltage across the winding is then the line voltage divided by √3. For example, at a 400V line voltage, a star-connected winding sees 400/1.732 ≈ 231V. This is exactly why a 230/400V motor is connected in star on a 400V supply: each winding gets the 230V it needs. To grasp this logic when reading a nameplate, see our guide to reading the IE3 nameplate and our general nameplate matching article.
Which Connection on a 400V Supply?
In the vast majority of industrial facilities the line (phase-to-phase) voltage is at the 400V level. In this case:
- A 230/400V motor: is connected in STAR (Y) on a 400V supply. Each winding must see 230V, achieved by dividing the 400V line voltage by √3 in star.
- A 400/690V motor: is connected in DELTA (Δ) on a 400V supply. Each winding must see 400V, which is applied directly in delta.
The most critical rule here is: on the same 400V supply, the connection is reversed depending on the motor's voltage pair. If you wrongly connect a 230/400V motor in delta, each winding sees 400V (√3 times what it needs), causing the winding to draw excessive current and burn within minutes. For supply voltage and correct connection selection, our IE3 voltage tolerance article is an additional reference.
Beyond Generic Terminal Bridging: Focus on IE3 and the Voltage Pair
The general logic of the six-terminal (U1-V1-W1 and U2-V2-W2) bridging arrangement in the terminal box is detailed in our electric motor terminal connection article and our star-delta wiring guide. This article focuses specifically on the voltage-pair selection of IE3-efficient motors, because for IE3 motors correct connection affects not only operation but whether the high nameplate efficiency is actually achieved in the field. An IE3 motor running at the wrong voltage overheats despite its premium class and loses its efficiency advantage.
Bridging in the Terminal Box: Step by Step
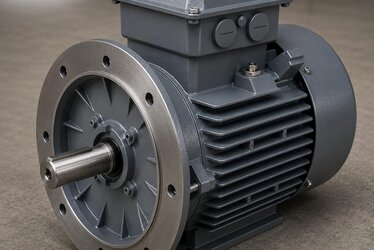
A standard IEC three-phase motor terminal box has six screws. The top row is U2-V2-W2 and the bottom row U1-V1-W1 (the layout may vary by manufacturer; always check the diagram inside the nameplate). The supply cables are always connected to U1-V1-W1 (the bottom row). What determines the connection type is how the top-row bridges are arranged:
Bridging for Delta (Δ) Connection
In delta, the end of each winding connects to the start of the next. In practice, vertical bridges are used in the terminal box so that each winding is connected between two phases and sees the line voltage directly.
Bridging for Star (Y) Connection
In star, one end of all three windings (U2-V2-W2) is joined at a single common point with a horizontal bridge plate. The supply still arrives at U1-V1-W1. In this case each winding sees the line voltage divided by √3.
Why Is a 400/690V Motor Chosen for Star-Delta Starting?
Star-delta (Y/Δ) starting is a classic method to reduce starting current on larger motors. The motor first starts softly at low voltage in star, then switches to delta after the speed builds up and produces full torque. But this method has one critical requirement: the motor's normal running (delta) voltage must equal the supply line voltage.
If you will perform Y/Δ starting on a 400V supply, the motor must be labelled 400/690V (Δ/Y). Because:
- At start, it is wired in star: 400V supply is applied to the star, each winding sees 400/√3 ≈ 231V (low voltage, low current, soft start).
- At transition, it is switched to delta: 400V supply is applied to the delta, each winding sees 400V (full running voltage, full torque).
If you buy a 230/400V motor and try Y/Δ starting on a 400V supply, each winding sees 400V (√3 times what it needs) when it switches to delta, and the motor burns. That is why IE3 motors intended for Y/Δ starting must always be ordered with a 400/690V nameplate. When choosing a starting method, see our star-delta vs soft starter article, our transition time and timer setting article, and our LRA and starting current article.
Direct Operation on a 690V Supply
In some large facilities, distribution is at the 690V level. In that case the 400/690V motor is connected directly in star and runs at 690V; each winding still sees 400V. The advantage of running at 690V is a lower line current for the same power, allowing thinner cables and smaller switchgear. We cover this in detail in our 690V asynchronous motor selection article. For correct rated current, cable and fuse selection, refer to our IE3 rated current article.
Risks of an Incorrect Connection
A connection error has two directions, and both have serious consequences:
- Overvoltage (over-connection): A 230/400V motor wrongly wired in delta on a 400V supply. The winding sees √3 times more voltage than it should, current rises rapidly, the winding insulation (even F or H class) breaks down at excessive temperature, and the motor burns. This often happens within minutes, even seconds.
- Undervoltage (under-connection): A 400/690V motor wrongly wired in star on a 400V supply. Each winding sees only 230V, the motor produces a weak magnetic field, cannot start under full load, runs with high slip and overheats by drawing excessive current. In this case the thermal protection trips repeatedly.
The way to prevent both errors is to read the nameplate and measure the supply voltage before connecting. For early warning by monitoring winding temperature, see our PT100 and thermistor protection article; for commissioning checks our commissioning checklist; and for incoming inspection our incoming acceptance inspection article.
The Correct Voltage to Preserve IE3 Efficiency
IE3 premium-efficiency motors deliver their highest efficiency when operated very close to their nameplate voltages. If the supply voltage deviates more than 5% from the nameplate value, both efficiency and power factor drop. Correct connection selection therefore not only prevents burnout but also preserves the energy-saving promise of the IE3 investment. For efficiency measurement and certification, see our IE3 efficiency measurement article; for the role of power factor our cos phi correction article. You can reach our full IE3 motor range from our IE3 stock guide.
The Most Common Connection Mistakes in the Field
Terminal connection looks simple, but the same mistakes are made repeatedly in the field. Knowing them in advance prevents the motor from burning on first start:
- Leaving the bridge plates in the wrong position: Most motors arrive from the factory with a particular bridge position. If the installer connects without checking the supply voltage, the factory setting may not match the facility's voltage. On every motor, the bridging must be confirmed before connecting.
- Leaving the bridge bolts loose: If the common-point bridge in star or the cross bridges in delta are loose, the bridge heats up under high current, oxidises and over time increases contact resistance, leading to local heating and phase imbalance.
- Connecting the supply cable in the wrong order: The supply must always arrive at U1-V1-W1. If connected to the top row (U2-V2-W2), the connection logic is broken.
- Connecting by habit instead of by nameplate: If the previous motor was 400/690V and wired in delta, reflexively wiring the newly arrived 230/400V motor in delta too is the most dangerous mistake.
The common solution to all these mistakes is to read the nameplate, measure the supply voltage and verify the bridge position before connecting. For connection and rotation checks at the delivery stage, our incoming acceptance inspection and rotation direction and phase sequence articles are good guides.
Terminal Box, Gland and IP Protection
As much as correct bridging, the terminal box itself must be properly protected. IE3 motors are usually IP55; however, if the terminal box cover is not closed correctly or the cable entry is not sealed with a proper gland, moisture and dust enter and cause corrosion on the bridges and terminals. This increases contact resistance over time and lowers insulation. Choosing the terminal box orientation and cable entry side according to the panel side eases installation and reduces cable load. We detail these topics in our terminal box and cable connection and terminal box orientation and cable entry side articles. Completing the grounding connection to the grounding terminal in the box is also essential for electrical safety; we cover this in our grounding and electrical safety article.
Correct Connection, Rated Current and Protection Compatibility
Star and delta connection also affect the current the motor draws from the supply. Wiring the same motor in star or delta on the same supply changes the line current; therefore cable cross-section, fuse, contactor and thermal relay settings must match the correct connection. If the thermal relay current range is not set to the motor's actual operating current, it either trips unnecessarily or leaves the motor unprotected under overload. For cable and protection selection by rated current, see our IE3 rated current article; for circuit breaker setting our MPCB selection and setting article; and for requesting protection devices together our protection devices purchase article. Since protection against single-phasing is also critical, see our single-phasing (phase loss) article.
Frequently Asked Questions
What happens if I connect a 230/400V motor in delta on a 400V supply?
Each winding sees 400V, which is about √3 times the 230V it was designed for. The motor instantly draws excessive current, the winding insulation overheats and it usually burns within minutes. On a 400V supply, a 230/400V motor must be connected in star. Before connecting, read the nameplate and measure the supply voltage.
Which nameplate motor should I order for star-delta starting?
If you will perform Y/Δ starting on a 400V supply, the motor's normal running voltage in delta must be 400V, which means a 400/690V (Δ/Y) motor. A 230/400V motor is not suitable for Y/Δ starting, because the windings would be over-voltage when switching to delta. Always state the starting method when requesting a quote.
How do I tell which voltage pair my motor has?
The nameplate lists the voltage values and connection symbols (Δ and Y) side by side. The lower value belongs to delta, the higher to star. If the nameplate is unreadable, it can be determined by measuring winding resistances and using the terminal layout; however, the most reliable approach is to clarify the correct voltage pair at the time of ordering.
Get a Quote
We supply IE3 motors with the correct voltage pair, matched to your facility's supply voltage and starting method, from stock or on a project basis. For technical support on connection type, terminal bridging and nameplate values, contact us at +90 (532) 345 49 86 or via our contact page. For our product range, see our electric motors blog and our IE3/IE4 efficiency mandate article.
Purchasing and Selection Checklist
- Have you measured the line (phase-to-phase) voltage at your facility? (400V or 690V)
- Have you verified the voltage pair on the nameplate (230/400V or 400/690V)?
- Are you planning direct-on-line or star-delta starting?
- For Y/Δ starting, did you order a 400/690V motor?
- Did you check the terminal bridging against the diagram inside the nameplate?
- Did you connect the supply cables to U1-V1-W1 (bottom row)?
- Did you measure rotation direction and current on first start?
- Did you set winding temperature protection (PT100/PTC) and the thermal relay?
- Did you confirm the supply voltage is close to the nameplate value to preserve IE3 efficiency?